v19
Introduction
Starting with revision 20190627.1746, released on 6/27/2019, the method of importing TLS certificates has changed. Instead of importing them from the CLI, certificates MUST be imported from the Admin Dashboard.
If you have a PFX file, you can get help converting it at one of the below sites:
https://blogs.adobe.com/connectsupport/connect-on-premise-ssl-convert-pfx-to-pem-format/
https://www.xolphin.com/support/Certificate_conversions/Convert_pfx_file_to_pem_file
Accessing the Admin Dashboard
To connect to the Admin Dashboard, open a web browser and connect to https://<netLD-IP>/admin . Replace <netLD-IP> with your appliance’s IP address or resolvable hostname.
If this is your first time connecting to the Admin Dashboard, you will need to create an “API Token” (password). If you are reconnecting to the Admin Dashboard you will need the “API Token” (password) that was previously entered.
- Enter your API Token and Login.
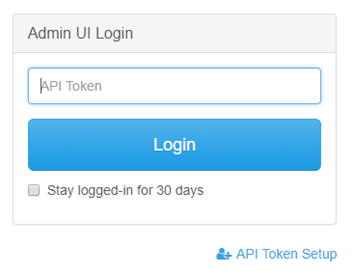
- If this is your first visit to the Admin Dashboard, select "API Token Setup".

- To set your new API Token enter an API Token (password) of your choice (You will need to remember your API Token for future access.) and Confirm your API Token. Then click on the “Update” button

Importing the TLS Certificate
To import your TLS certificate, you will need the following files:
File | Example |
Public Certificate (PEM) Example: cert.pem | -----BEGIN CERTIFICATE----- MIIDWzCCAkOgAwIBAgIJAJaJvqXaQ49GMA0GCSqGSIb3DQEBB BAYTAlVTMRIwEAYDVQQIDAlDb25mdXNpb24xITAfBgNVBAoMp Many lines like the above/below m0eLjosIIMqcA+CqVyAK4Yn5T8pCs/FkUqOUVFUWx+EQ724Xh f4xAq5kjj5DTPIw6CmmcWaxDaLWi2NUPUZMIUyJIo+U3n6YM= -----END CERTIFICATE----- |
Private Key (RSA un-encrypted) Example: private.key | -----BEGIN RSA PRIVATE KEY----- MIIEpQIBAAKCAQEAuPBe4tw/OjwQtyUXtEZ6PGCB7qbFy8CXc PIYseTmjd/ff81LalV9UllzxnyQEmu6eTYQtFsvDdmlwnzE4e Many lines like the above/below QPfqHrWiGgFVnrM71IYo5J83pAjucdqgyQrq362qgeP2LQo9B RdAbXV3YAC+v7ZwsIzQkLxx20FIMMtPriphEsdak= -----END RSA PRIVATE KEY----- |
CA Certificate (PEM optional) Example: cacert.pem | -----BEGIN CERTIFICATE----- MIIDWzCCAkOgAwIBAgIJAJaJvqXaQ49GMA0GCSqGSIb3DQEBB BAYTAlVTMRIwEAYDVQQIDAlDb25mdXNpb24xITAfBgNVBAoMp Many lines like the above/below m0eLjosIIMqcA+CqVyAK4Yn5T8pCs/FkUqOUVFUWx+EQ724Xh f4xAq5kjj5DTPIw6CmmcWaxDaLWi2NUPUZMIUyJIo+U3n6YM= -----END CERTIFICATE----- |
- After logging in, select “Update” from the top menu then “TLS Certificates”.

|
|

- The display will update to show success or failure (If the status stalls after clicking “Upload” refresh the screen)

Was this article helpful?
That’s Great!
Thank you for your feedback
Sorry! We couldn't be helpful
Thank you for your feedback
Feedback sent
We appreciate your effort and will try to fix the article